Point-and-click RPG puzzle game Royal Legends blends lots of game elements into a compelling storyline, with image-finding and even match-three mini-games sprinkled in if you want them. The wealth of choices means you may always find a way around the puzzles. However, some of the point-and-click solutions span across several screens with loads of items you can use, so it can be quite frustrating if you get stuck. If you need a bit of a steer, read on for Chapter 3 of our Royal Legends 1: Marshes Curse walkthrough.
Royal Legends 1 - Marshes Curse Chapter 3 full walkthrough
This is thethird partof my Royal Legends 1 walkthrough, concluding the story from when you arrive atMargeria’s Housethrough the Druid’s portal. If you need help and information on earlier parts of the game, click through to the information you need here:
Preparing for the ritual
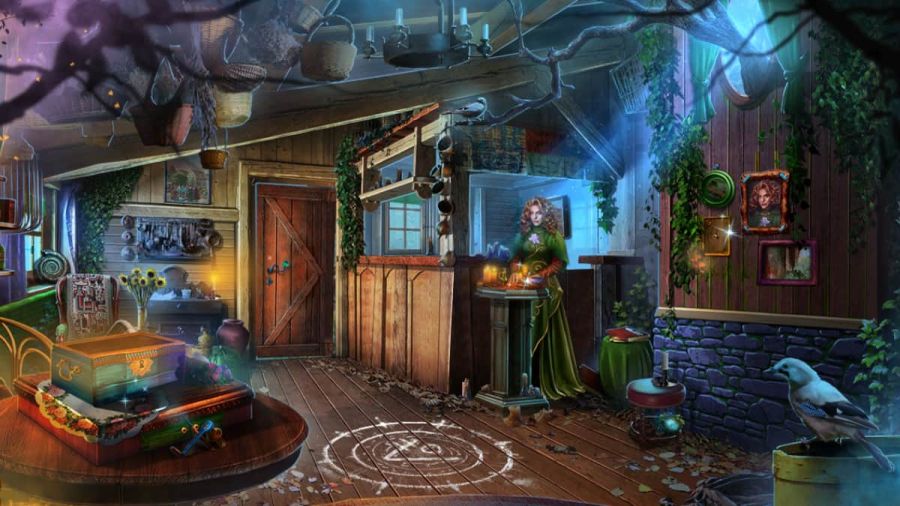
Arriving at Margeria’s house, she explains that you need to perform a ritual to be able to remove the unwanted gift given to you by the witch. Take the Amulet under theStool(a1), then select the boxes on theTable(a2) and take theWitch’s Coins,Lockpicks, andWinch Handle. Use the Ribbon on the two small holes in the drawer here to pull it open and take theRakeandPliers Part.
Select the Broken Pliers in your inventory and add the Pliers Part to fix them, gainingPliers. Next, click theDoor(a3) and try to turn the key, which breaks. Use the Pliers to open the door, then headoutside of Margeria’s Hut.
Once outside, grab theWitch’s Belongingsby theTree Stump(b1), then click theMusic Box(b2) for a close-up. Take theMagnet, then use the Wrench to open the wooden box here and take theHook. At theWell(b3), take theWitch’s Coinsand attach the Hook to the Well Chain. Click the well handle on the right to bring up the well’s bucket and take theChainfrom inside.
Next, select theArchway(b4) to the left of the image and take theBracelets. Add the Chain and Winch Handle (you just need to add them to the middle of the close-up image, not to the exact spots such as the handle hole), then click the handle once attached to fix the pillar. This turns the archway into a match-three or pattern-matching mini-game. Once complete, collect theKey. Click theGate(b5) and use the Key to enter theGarden.

In the garden
Take theAmuletat the bottom of theSteps(c1), then select theStatue(c2) and take theGlove. Then, use the Seashell to clear the vines and take theSpell Book. Come back out to the main image and select theTree(c3), where you may pick up aFangand use the Rake to clear the leaves, under which you’ll find the secondLock Pick.
Click thePumpkin Patch(c4) next, taking theWitch’s Coinbefore opening the bag with the Lockpicks. Take theHerbsfrom the bag, go back inside the house, and add the Herbs and Spell Book to theAltar(a4) where Margeria is standing to enter a mini-game. You need to move the scroll around until the symbols in its holes match the clue on the parchment on the left of the screen. As with all the puzzles here, you can’t fail, but you can see theEasy solution below.Once done, enjoy the cutscene and then take theTapestry.

Get into the cave
Click the pictures on theWall(a5) and add the Tapestry to the missing frame, opening a secret compartment from which you’re able to take theBarrel Organ Cylinder. Head back outside and add it to the Music Box (b2), which opens a compartment. Take theNutsfrom inside and feed them to the Squirrel (b3), who will run off and allow you to pick up theHairpin.
Back in the garden, use the Hairpin on the planks blocking the hole in the Tree (c3) and take theTorchfrom inside. Then, use the Magnet to get your secondBraceletthat is stuck in the back of the same hole. Click back on the Statue (c2), add the Bracelets, then complete the gem-swapping mini-game to get theMirrorandWinding Key.

Head into the house and use the Winding Key to open the blue box on the Table (a2) and take theCork, then use the Glove on the broken glass to take theBrushandSquirrel Statue. Back in the garden, select theHut(c5) at the top of the steps and add the Horn and Squirrel Statue to the window seal there, using them to smash the lock. After a match-three or item-finding mini-game, you’ll find theOintment. Take the Ointment outside and give it to theReindeer(b6), who will now take you to the cave entrance.
Finding the Magic Compass in Marshes Curse
Grab theWitch’s Belongingsat thebase of theTree(d1), then click theTree(d2) itself and take theIron BarandOakum. Combine the Oakum with the Torch in your inventory to get the Oakum Torch, then light the Torch in theFirepit(d3) to get theFlaming Torch. Use the Flaming Torch on theCave Entrance(d4) and complete the runes mini-game. When you click the correct starting rune, it will go dark (see image below). From there, just click the next rune that is as many arrows from (in the arrow’s direction) it as there are arrows on the rune. Once done, you’ll get access to theCave.
Related:Echo Bay Murders – Chapter 1 Walkthrough
Enter the cave for a brief cutscene, then pick up theAmuletby theWooden Post(e1). Click theWell(e2) and take theTongsandTarot Cards, then use the Brush on the green dust here and take theAmuletfrom beneath it. Next, use the Amulet on the wall at theback of the cave(e3) to open theSecret Roomand go inside.
Grab theWitch’s Belongingson thefloor by the Altar(f1) before clicking theAltar(f2) and taking theBas-Relief Part. Still in this close-up, use the Mirror on the lasers to open the green box and take theWitch’s Pendantfrom inside.

Click theother Altar(f3) at the top of the stone steps and take thePaper,Sharp Stone, andWitch’s Coins. In the same close-up, use the Cork on the spike of the Lantern to open it and take theCandle. Switch to theback of the cave(f4) and add the Witch’s Pendant, Tarot Cards, and Candle to the close-up image. Complete the match-three game or item-matching game (you choose). This triggers to get theSheet Music.
Find the magic words
Select theHarp(f5) and place the Sheet Music here to open a secret drawer and get theStrap. Back at the Well (e2), add the Iron Bar and the Strap to the close-up image to bend the bars and take theRopeandGobletfrom underneath.
In theCave(e4) on the right side of the Secret Room, take theWitch’s Coinsand then use the Goblet to dig in the sand and get theClothespin, then take back the goblet to getSand. Go back outside and use the Sand to extinguish the Firepit (d3) and use the Tongs to collect theCharcoalfrom inside the firepit. Also, take theWitch’s Coins.

While you’re outside, select the Tree (d2) and use the Paper and Charcoal to copy the runes and receive theCode. Back in the Secret Room, place the Code on the stone slab on the Altar (f2), which will open up and let you take theCompass. In addition, after a cut scene, Margeria will give you aBottle.
Find the Swamp Witch’s hut
Now go up the steps (f3) in the secret room and use the Bottle to get someWater. Once you’ve got it, click the water here once more to get the secondBas-Relief Part. Back in the main cave, click theSandstone Pillar(e5) and use the two Bas-Releif Parts to trigger a jigsaw puzzle. Each piece makes a clicking sound when you put it in the right spot, and can no longer be moved, while if wrong you can just move it again, so it’s impossible to fail the puzzle (see completed image above). You’ll be rewarded with aPickaxe.
Click the cave area on the right (e4) and use the Pickaxe on the stones there and take theNoteandHandkerchief. Still in this close-up, use the Stone to get theNet. Head back to the secret room, click the Harp (f5), and add the Net to the Pole to get aButterfly Net. Go outside and use the Butterfly Net on the Tree (d2) to get the secondRopeand aBrush. Connect the two pieces of Rope in your inventory and then use theLong Ropeon the tree stump (d5) to climb down to the forest andfind the Swamp Witch’s Hut.

Getting Rid of the Roots
Get theAmuletto theleft of the door(g1), then select theDoor(g2), and take theRunesand theWood Chip. Click the Key, which will break in the lock, then use the Clothespin to open the door and start a match-three or item-finding puzzle to get theAxe. Select the left root and use the Axe to destroy it, which lets you gobehind the Living Hut. Go there now.
Related:Escape the Bathroom Walkthrough
Take theWitch’s Belongingsfrom thedead tree(h1), then select theBasket(h2), and take thePegandNeedle and Thread. Afterward, add the Handkerchief and Water to the basket so you may open it, and take theWhetstoneandWitch’s Coinsfrom inside. Use the Whetstone on the Blunt Axe in your inventory to sharpen it once more to get aSharp Axe, then use that on theleft-of-center root(h3) to remove it. Once destroyed, take theMatchesthat were behind it.
The third and fourth roots
Go back to the front of the house, select theCart(g3) to the right of the hut, and use the Matches on the orange resin to melt it. Use the Brush on the resin to get aBrush With Resin, then use that on the Horn here to fix it and take theBugle. Select theCentral Root(g4), use the Bugle to scare off the birds, and take theButtonand your secondRune.
Return to behind the hut and select theBox(h4) there, then add the Runes to it to begin a gem-swapping puzzle. You just need to switch runes until they’re all connected, noting that they get agreen edge once in the right place. Once complete, you’ll get aCufflinkandAxe Headfrom inside. Select the Axe Handle in your inventory and add the Wood Chip and Axe Head to it to get theAxe, then move to the front of the house and use it on the central root (g4) to remove it. Take theWheelandWitch’s Coinsthat are behind it.

Select the Cart (g3) once more and use the Metal Pin to attach the Wheel. With the cart moved, take theCandleand then use the Axe on the roots that were behind the cart. This brings the Tree Hut down to the ground, allowing you to get inside.
Piercing the Tree Hut’s heart
Now inside, take theAmuletfrom the root just below the left cabinet (i1). Select theCabinet(i2) and take theFrame PartandShovel. Still in this close-up, click the cloth to move it and use the Button on the broken handle to open the drawer. Click the drawer for another close-up and use the Needle And Thread to fix and then take theHat.
Select theBoiling Pot(i3) and use the Hat to fan away the poisonous fumes. Collect the secondFrame Partsand someWitch’s Coins. Next, click theWall Cupboard(i4) and use the Frame Parts to open it, triggering a match-three or item-matching game. If you go for item matching, note that the ropes on the right change the picture, and some items may need a mismatched image for you to collect them. Once finished, you’ll get theDagger. Use the Dagger on theHeart(i5) to destroy the House.

Defeating Bertha in Royal Legends 1
Use theDaggerto cut your restraints. Once the battle begins, take theWitch’s Belongingsnear theMushrooms(k1) and then click theTree Stump(k2). Take thePinandWitch’s Coins, then click theBag(k3) and take theCandle. Use the Pin to unlock the bag puzzle, moving and rotating the shards until they’re all in place. Once the bag is open, take theNoteand theMagic Wand Base, then use the Cufflink to open the pouch and get theGlove.
Related:How to beat Riddle School 5 – Walkthrough Guide
Go back to the main image and select theThorns(k4), using the Glove to clear them and get theFastener. While you’re still here, use the Shovel to remove the dirt and take your thirdCandle. Place the Candles on the tree stump (k2), then take theMagic Wand Partfrom the secret compartment. You should have three wand parts in your inventory, so use them to make theMagic Wand.
Select the Wand in your inventory, click thegreen forcefield in the middle of the screen(k5), and begin a collection puzzle. See the image above for an example of the puzzle completed. The key is that you canretrace your stepsas much as you like, so you don’t need to keep moving onto inefficient spaces. With the puzzle complete, you’ll havecompleted the main storyline!

You can now take on the Bonus Chapter of Royal Legends. If you do, check out ourRoyal Legends 1 Bonus Chapter Walkthroughhere at Pro Game Guides!
