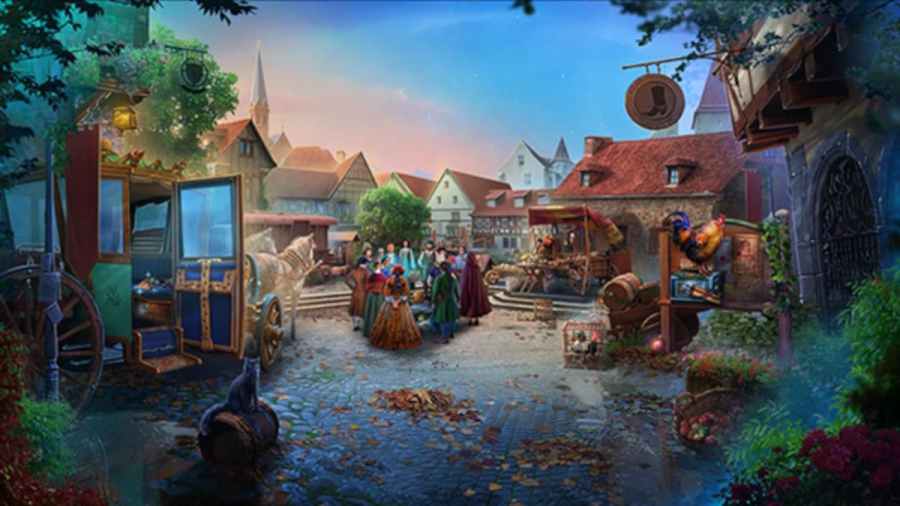
Royal Legends is a classic point-and-click puzzler with fantasy RPG elements. You’re presented with a series of scenes in which you’ll have to identify and combine objects, using them to open up new areas and secret compartments as you follow the storyline and complete quests. In the first part of Royal Legends 1, Marshes Curse, you were tricked by the Witch and thrown in jail, but luckily you have some allies. Below you’ll find Chapter 2 of our Royal Legends 1 walkthrough.
Royal Legends 1 - Marshes Curse Chapter 2 full walkthrough
This is thesecond partof my Royal Legends 1 walkthrough, covering you from when you’rethrown in Jailup to when you go through the Druid’sportal toMargeria’s House. If you need help and information on the start or end of the game instead, follow these links to the other sections of this walkthrough:
Related:How to beat Riddle School 5 – Walkthrough Guide
Note that I’m playing this on PC, so theexperience on a mobilemay be a little different. Also, note that I’ve experiencedseveral annoying bugs in puzzlesin the game, which have sometimes meant I’ve had to skip them as the mechanisms don’t work. However, skipping via a Hint has always worked to get around the bugs andI was able to complete the game.
Breaking Free
Grab the Witch’s Belongingsunder the bunk(a1), then click theBarrel(a2) and take theShackles. Select theBunk(a3) and take thePlank. Click theWindow(a4) for a cut scene, after which you’ll get your bag back. Select the bag in your inventory and take theMagnet,Leaf Cup,Corkscrew, andPendant.
Use the Corkscrew on the Cork on the Barrel (a2), and take theWitch’s Coinsand theCork. Use the Cork on the spike on theDoor(a5) to slide open the hatch, then give theMouseby the Barrel theCheesethat the guard gives you. You can now take theHeavy Boot. Use the Boot and the Pendant on thebricks by the Bunk(a3) where you removed the Plank and complete the simple puzzle (or play match-three) to gain theFile. Use the file on the window bars (a5) toescape the cell.
Hide from the guards
Select theNewspaper Stand(b1) and take theBoltandSeam Ripperfrom the soil in the plant pot. Then use the Leaf Cup to dig into the soil and take theDoor Knocker. Click theTannery Door(b2) and attach the Door Knocker to it, after which you’ll have access to theWorkshop. Don’t miss theAmulet(b3) on the Tannery steps.
Enter theWorkshopand select thecupboard on the right(c1). Take theIncomplete SpectaclesandMatches. Use the Magnet to open themetal lockholding thetop cupboard doorsopen and take theFeather DusterandWitch’s Coinsfrom inside.

Fix the glasses
Click thetable(c2) and use the Feather Duster to clear the glass. Now take the secondPlank,Lenses, andScraperfrom the table. Take theWhich’s Belongings(c3) from the left of the table, then select theBroken Stairs(c4) and use the two Planks to start a simple plank-size puzzle. You can’t go wrong, as you simply need to keep placing a plank until it is straight (some steps combine two planks). Once all are placed, you’ll have access to the Cellar.
Go into theCellarand grab theAmuletby the barrel (d1), then click theDumb Waiter(d2) at the back of the cellar, and pick up theVise Lever. Next, add the Shackles to the chain here and pull the lever to open the metal hatch. Take theTwo-Pronged Forkfrom inside.

Click theBox(d3) and take theBroken Hammer, then use the Two-Pronged fork to open the box and take theBookandWirefrom the box. Select the Incomplete Spectacles in your Inventory and add the Bolt, Lenses, and Wire, to make theSpectacles. Use the map to go back upstairs to the Workshop and give the Spectacles to Heinrich. He’ll give you the gloves you need and hisRing.
Get to the Druid’s house
Click the table (c2) and then the Green Bag, use the Ring to open it, then complete the simple puzzle to open it up. Take theComb, then use the Seam Ripper to remove the leather patch on the inside of the bag and take theHandkerchief.
Head outside to the street and select theFountain(b4), use the Handkerchief on the broken pipe, and add theStrapthat’s by the fountain already to complete the patch-up job. Once the water has drained, take theAwland theWitch’s Coinsfrom the dry fountain. Finally, use the Scrapper to remove the moss here and take theCoinsunderneath.

Related:Lost Lands 3 Full Walkthrough (Golden Curse)
Go to the newspaper stand (b1) and put the Coins in the hand to get theNewspaper. Now go back down into the cellar and select theFireplace(d4). Add the Matches and Newspaper to light the fire. Once the fire is glowing, click it again to find the items required, or play match-three and get thePike Poleafterward. Use the Pike Pole to get aWooden Chipand the secondBookfrom the dumb waiter (d2).
Move back to the Workshop and use the Books on the shelf in the cupboard (c1) to open the secret compartment and take theFanand aBent Amulet. Head into the Cellar again, select the Vise (d5), and add the Vise Lever to it. Use theBent Amuletin the Vise (place the Amulet, then click the Vise Handle) to get anAmulet.

Select theShelves(d6), take theWitch’s Coins, then use the Amulet to open the draw. Remove theChalkandHammer Headand combine it with the Handle and Wood Chip in your inventory to make aHammer. Head outside, select the Horse (b5) and use the Hammer to fix its shoe. Finally, complete the simple driving game to escape the town.
Stopping the Witch in Marshes Curse
Click thePond(e1) and take theTweezersandCogwheel. Next, click the Rope and Stick on the ground here and add the Comb from your inventory, making aForkthat you can immediately use to move the grass aside. Take theLily Padyou find under the grass.
Select theFront Door(e2), place the Lily Pad on the floor under the door, and then use the Awl to push the key through the lock. Take theKeyfrom the floor and use it to open the door and enter the Druid’s House.

Once inside, grab theAmuletneat the Witch’s feet (f1) then select thePortal(f2) and take theUncharged Magic StaffandWooden Peg. Click theWindow(f3), use the Fan to clear the poisonous gas, then take theWitch’s Coins,Note, andMagical Dust. Use the Magic Dust on the Uncharged Magic Staff to make aMagic Wand, and use it on the Witch to save Aldred the Druid. After a cut scene, he’ll give you theRug Pattern.
Healing Aldred
Click theLoom(f4), add the Rug Pattern, then click the Loom once more for your choice of pattern-matching or match-three. Once complete, take theRug. Select theDoor(f5), use the Rug on the stairs, and go down into the Pantry.
Take theWitch’s Belongingsnext to thetree stump chair(g1), then click theCabinet(g2) and pick up theWitch’s Coins,Holly Twig. Apply your Chalk to the Instructions, and then pick up theRecipe.

Select theChest of Draws(g3) and pick up the secondCogwheels, then put the Recipe on the table here. Follow the recipe, using the red, purple, then green potions here on the Acid bottle, and then take theAcid. Next, click the piece of paper here that’s on the green surface and note what you need to make theLife-Giving Potion.
Related:Must Escape The Wizards Castle Walkthrough
Click theDesk(g4) and take theBread. Use the Acid on the padlock to open the drawer and take theEmpty Oiler. Then use the Tweezers on the drawer to get the third and lastCogwheels.Next, click theGrandfather Clock(g5) and add the Cogwheels to start a puzzle. You simply have to move the red and blue cogs along paths until they’re in their colored positions, and you can’t fail. Once done, take theDruid’s Hatfrom the opened compartment.
Go back to the Pond (e1) and place the Druid’s Hat next to the water. Take theBowlandSawthat appear in the water. Select theTree(e3), take theWitch’s Coins, then use the Saw to cut the roots and take theHennaandMetal Sponge. Next, use the Wooden Peg to dislodge the stone that’s also in the tree trunk and take theRuby Eye.

Head down into the Pantry and select the Desk (g4), then add the Ruby Eye to thered bookto start a matching mini-game (solution below). Once complete, the book will open, and you can take out theRibbon,Portal Activation Instructions, andDragon Scale. Move over to the Chest of Draws (g3) and place the Holly Twig and Dragon Scale in the grey mixing pot to make theLife-Giving Potion. Take it upstairs and give it to Aldred. Now fully recovered, he explains to you how to defeat the Swamp Witch. He also gives you aGriffin Figurine.
Get to Margeria’s House
Go over to the window (f3) and use the Griffon Figure to prop it open, taking theWrenchfrom the windowsill. Click the bird outside for a close-up and give it the Bread. It will fly off, allowing you to collect theTree Amulet. Go back outside and use the Tree Amulet to open theGreenhouse(e4). Complete the find-the-difference puzzle (or play match-three) and collect theBerries.
Give the Berries to the badger by the Tree (e3), who will move away and allow you to pick up theBroken PliersandCologne. Click on theBarrel(e5) and use the Cologne to get rid of theBees, then pick up theBrush. Pick up theSunflowerhere, too, and put it into the barrel. Place the Empty Oiler under the barrel spout to fill it, then recollect theOiler.

Head down to the Pantry, select the Cabinet (g2), and use the Oiler and Brush to clean and then open the green box, taking theSeashellandWaterfrom inside. Select the Henna in your inventory and add the Bowl, Brush, and Water. You now haveHenna Paint.
Back up in the Druid’s House, place the Portal Instructions and Henna Paint on the Portal (f2). This starts a symbol-combining mini-game in which you need to make the hieroglyphs out of the symbols you’re given (see above for the correct symbols you need). Once complete, you can move through the portal toMargeria’s House,and you’ll have completed Chapter 2 of Royal Legends 1, Marshes Curse!

If you want to continue with this walkthrough, clickRoyal Legends 1 Walkthrough, Chapter 3to get the next section here at Pro Game Guides!
