Lead By Example is one of the Tier 3 Legion Faction missions in Call of Duty: Warzone 2 DMZ. In this mission, you are given the task to eliminate two DMZ bosses in under a minute. Although the challenge seems a bit difficult, it’s rather easy to complete with a neat trick, even while playing solo.
How to complete the Lead By Example mission in DMZ
How to kill 2 Commanders in 60 seconds in DMZ
Commandersare the boss AI combatants with more health and attack power than regular bots. The following Commanders spawn on different maps in DMZ:
We recommend you attempt the Lead By Example mission onAshika Islandbecause of the unique technique that we’re about to discuss. You can do this mission in Building 21, but the AI difficulty will be way too high and on Al Mazrah, the bosses are generally situated far apart from each other.
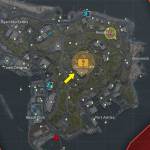
On Ashika Island, the Bombmaker resides inside the heavily-protectedTsuki Castlestronghold. You can bypass this security and take him outwithout even entering the hideout. However, you shouldlet the Commander Helo spawnfirst. This boss arrives when thetimer reaches 13 minutes. Around that time, try and capture either one of theSAM Sitesaround the Tsuki Castle (marked on the map above). This allows you to take out the Boss Chopper with much less effort.
Related:Missing Person DMZ Mission Guide – Sarrif Bay Bath House and Room B7 Locations
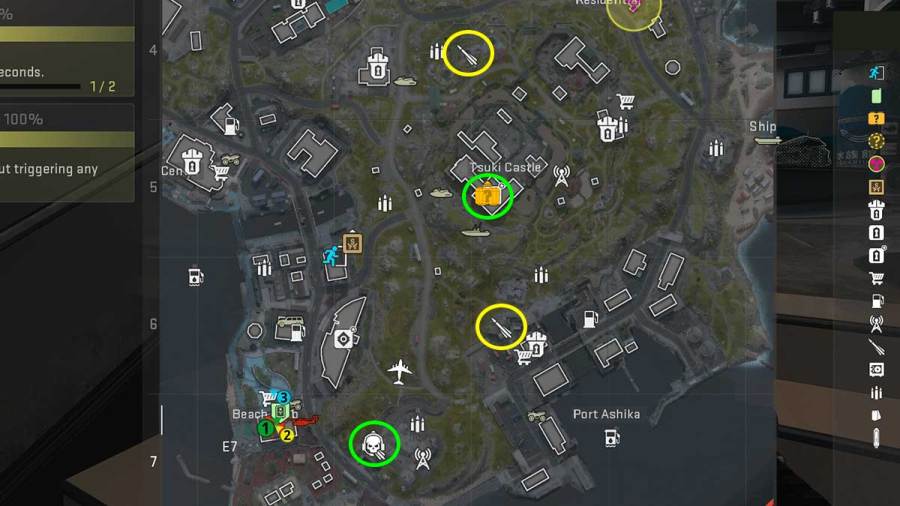
Once a SAM Site is captured and the Commander Helo has spawned in,lure it near the SAMby shooting at it. It will start firing missiles and bullets at you, but you’re able to take cover behind some rock or inside a building. Let the SAM turret take out the Commander Helo, which only takes a few seconds.
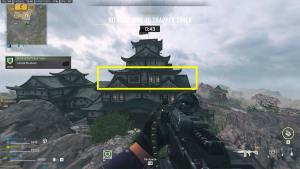
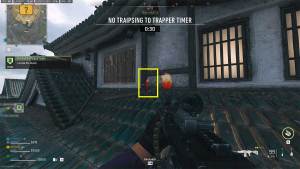
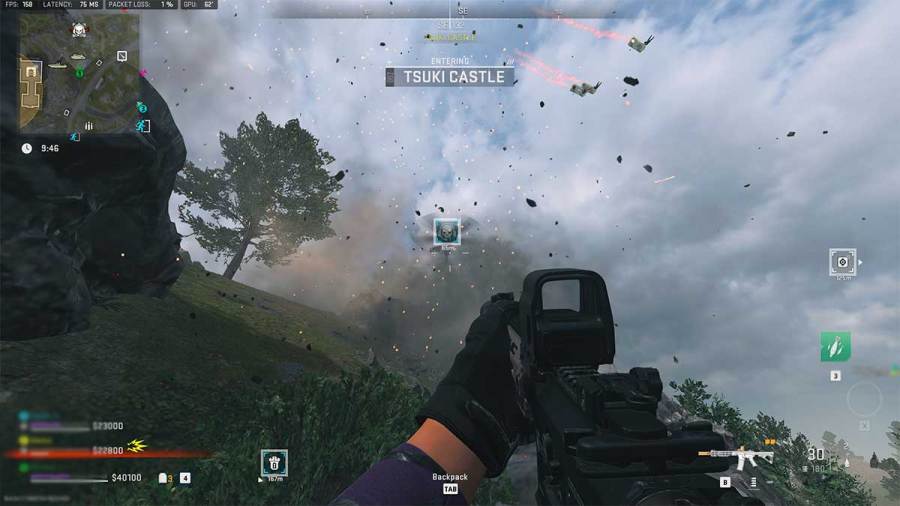
Once the Commander Helo is down, the Lead By Example timer of one minute begins. Time is of the essence here, therefore, quickly make your way to theroofof the Tsuki Castle building. It’s best to approach from thesouthwest cliffas you’re able to directly jump onto the building and will face little to no resistance from the bots. Climb onto the Bombmaker’s floor as shown in the second image and useSnapshot Grenadetacticals to highlight the enemies inside. The second boss you need to kill will be the one with no Riot Shield, and you can easily take him out through the window with one headshot.
Stay tuned to Pro Game Guides for more Call of Duty: Modern Warfare 2 and Warzone 2 content. In the meantime, head over to our article onInto The Deep DMZ Mission Guide – Kill enemies while swimming and underwater.