Failed Bombing is a mission for the Tier 4 Black Mous Faction in Call of Duty: Warzone 2 DMZ. In the mission, players are tasked to collect a disarmed charge, rearm it, and deliver it to a specific Dead Drop. Here’s a step-by-step guide on how to complete this mission.
Failed Bombing Mission DMZ
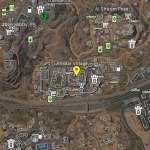
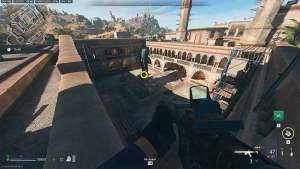
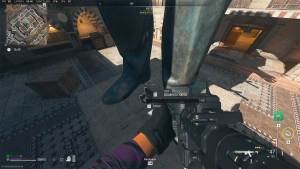
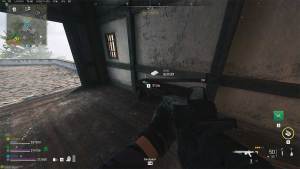
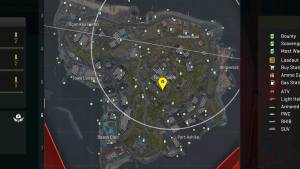
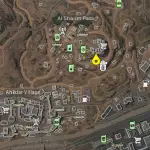
Where to get the defused charge from the Akhdar Statue
Firstly, deploy into the Al Mazrah map and head over toAkhdar Village, a POI in the central part of the map next to Zaya Observatory. At the location marked on the map above, you’ll find a statue of a person in the middle of the courtyard. Pick up the disarmed charge from thefeet of the statueand exfil for the next step.
Related:Handshake Deals DMZ Mission Guide
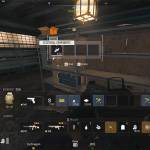
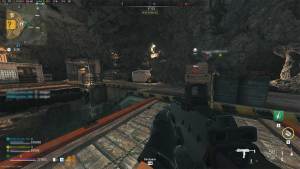
How to rearm the charge
You need to bring the disarmed charge you just extracted toAshika Island. After deploying onto this map, start searching for an Electrical Component and a Battery. You can easily acquire these common items from loot caches likecomputersandtool boxes. Take these two items and the disarmed charge to theWaterways Dead Dropsituated underneath Tsuki Castle. Open the dumpster, deposit the three required items, and then close it. Reopen the Dead Drop and therearmed chargewill be ready for you to grab. Stow it in your backpack and exfil from Ashika Island.
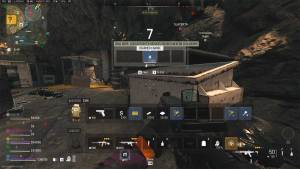
Where to dead drop the rearmed charge
Now, redeploy back into Al Mazrah and make your way to theAl Sharim Pass Dead Drop, situated in the eastern part of the map. You may recall visiting this dumpster for theSubstantial Findingsmission from the previous tier. Deposit the rearmed charge into the Dead Drop to complete the Failed Bombing mission. If you get eliminated during any part of this mission, you’ll have to restart all over again, hence, proceed carefully.
Stay tuned to Pro Game Guides for more Call of Duty: Modern Warfare 2 and Warzone 2 content. In the meantime, head over to our article onEyes And Ears DMZ Mission Guide.